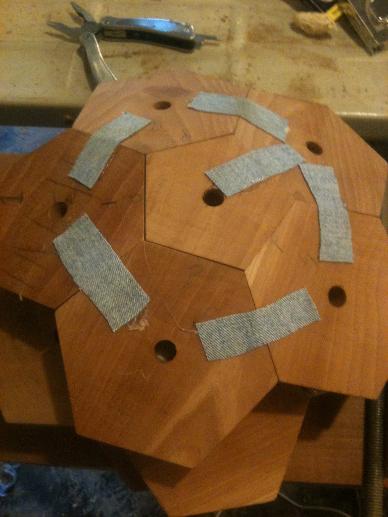
The globe was started as a polyhedron that approximated a sphere. It had to be round enough to still be thick enough after rounding all the corners off. In this case I used a 72-sided polyhedron - the same as my 26 inch globe. There are 12 regular pentagons, and 60 hexagons that are almost regular, but a few degrees off on the corners. If you'll look closely at this photo, you might see that the edges where a hexagon touches the pentagon is a little shorter than the other edges of the hexagons.
I needed a way to hold all the parts together before gluing it all at once. In the past I have used masking tape or staples to do this, but the tape gives out too easily and I didn't want staple holes in the edges that might not be completely removed while rounding. As shown here, I ended up hot-gluing strips of denim fabric from a worn out pair of jeans. A dab of hot glue on both sides of the edge with a strip of fabric on top held very securely and would also allow the parts to shift side-to-side if needed during gluing. Pressing the fabric into the hot glue with a block of wood saved my fingers from getting burned and strengthened the bond.
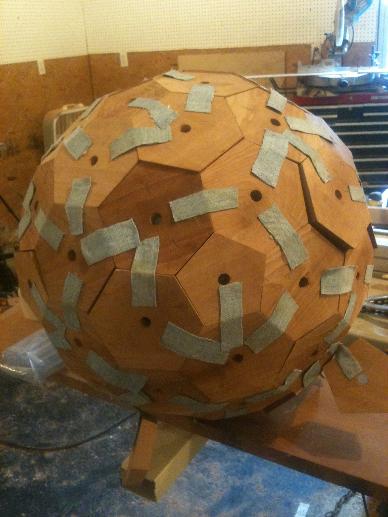
To assemble the polyhedron I put together 12 panels like in the photo above, each with one pentagon in the center surrounded by hexagons. These 12 flower-shaped panels were then assembled to complete the polyhedron. A problem I had to think about ahead of time was orienting the grain direction. My first globe had the grain oriented concentric with the centers of each of the 12 pentagons. My second and still incomplete 26 inch globe is made of plywood which would later be covered with solid hardwood, so the grain orientation didn't matter. I wanted the grain orientation on this globe to be parallel with the equator. In the end I had 10 each of hexagons with 6 different grain orientations. 10 of the 12 pentagons were all the same orientation, and the 2 polar pentagons would be segmented. The north and south poles pass through the centers of pentagons.
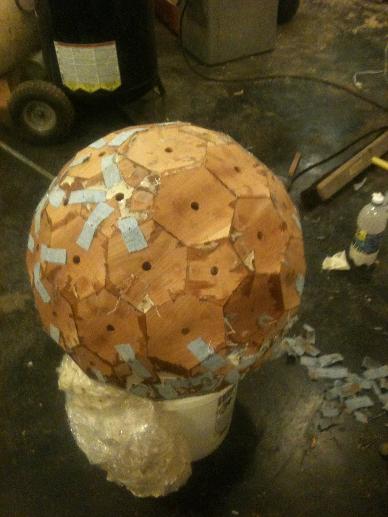
Like my other globes I have made, I glued it together all at once. Small box nails were used to keep each edge propped open for glue, and stretch wrap was used to provide clamping pressure to squeeze all the parts together. After pouring in the glue and filling all the joints, the nails were pulled and additional stretch wrap was used to squeeze tight as the glue cured. I had to use pliers to remove the fabric strips before rounding - it proved to be a very effective solution without failure.
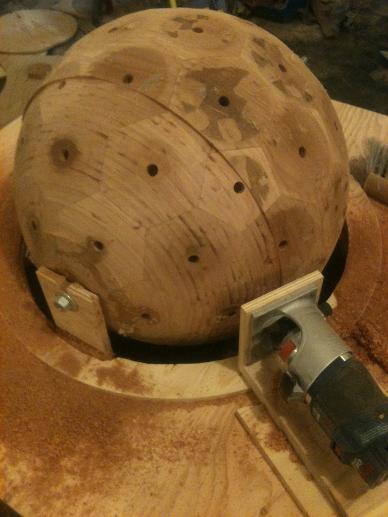
The polyhedron was way too big to be rounded on my lathe, so I made a special jig to round it into a sphere using a router. As shown, the router is horizontal and perpendicular to the sphere. The sphere is mounted on a threaded rod for an axle so that it can be turned. A plywood ring guides the router and is concentric with the sphere. The base of the router sled touches the ring at two points on opposite sides of the router keeping the axis of the router inline with the sphere radially. It worked really well.
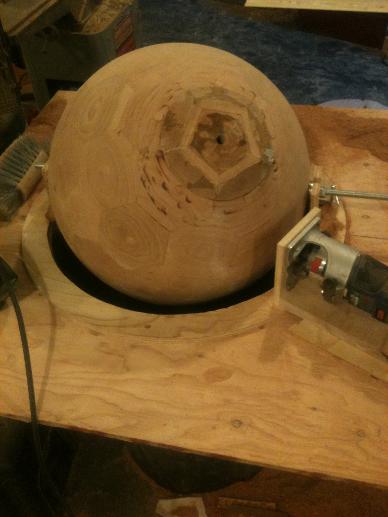
The router was not able to reach the area around the axle, so I re-mounted the sphere using another axis through a different pair of pentagons so I could round the polar areas. After rounding with the router, I glued in plugs for the holes and sanded it all smooth with a random orbit sander. Now the sphere is ready to be made into a globe.
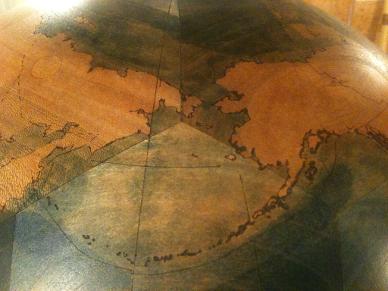
My newest globe is this 18" diameter cherry globe. The globe is made from only one kind of wood and does not have any inlaid areas. It has boundaries between countries, states, and territories, and the oceans are dyed blue. This globe also shows boundaries of tectonic plates. While it is not as colorful as my first globe I made with inlay, it does have much more detail. This photo was taken after shellac sanding sealer was applied.
The oceans were dyed blue using Transtint liquid dye. It was very blue when first applied, but I discovered how to give it a more antique look by carefully using bleach. It took a while detailing all of the borders with a fine brush. The next step will be to wet sand the sealer and apply the clearcoat.
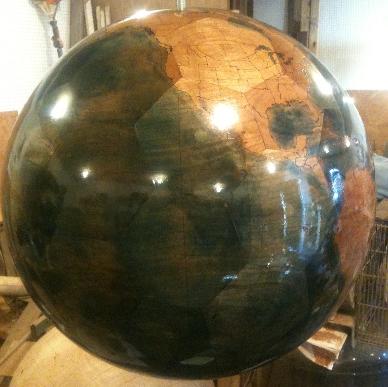
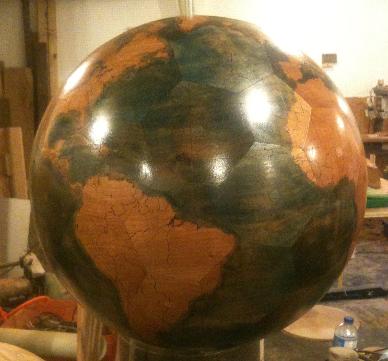
I chose gloss polyurethane as the finish for this globe. It looks good, but also makes it very difficult to photograph. The finish was applied using a trigger pump sprayer with the globe suspended. I used the same process I came up with for my shells - finish is thinned with naphtha and allowed to run off from the low point.
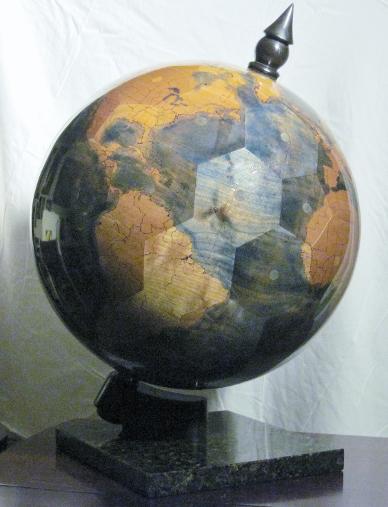
The support arm and finial are both made of ebonized cherry. The ebonizing solution I used in the past made of vinegar and steel wool did not make the wood as dark as I wanted, so I ended up charring the parts with a propane torch followed by buffing and waxing.
I like the way that the appearance of the polygon faces changes depending on how the light hits them. This emphasizes the polyhedral construction method. For future globes I will probably try to eliminate the plugged holes through the face centers.
Click here to see an animated gif of the globe spinning.