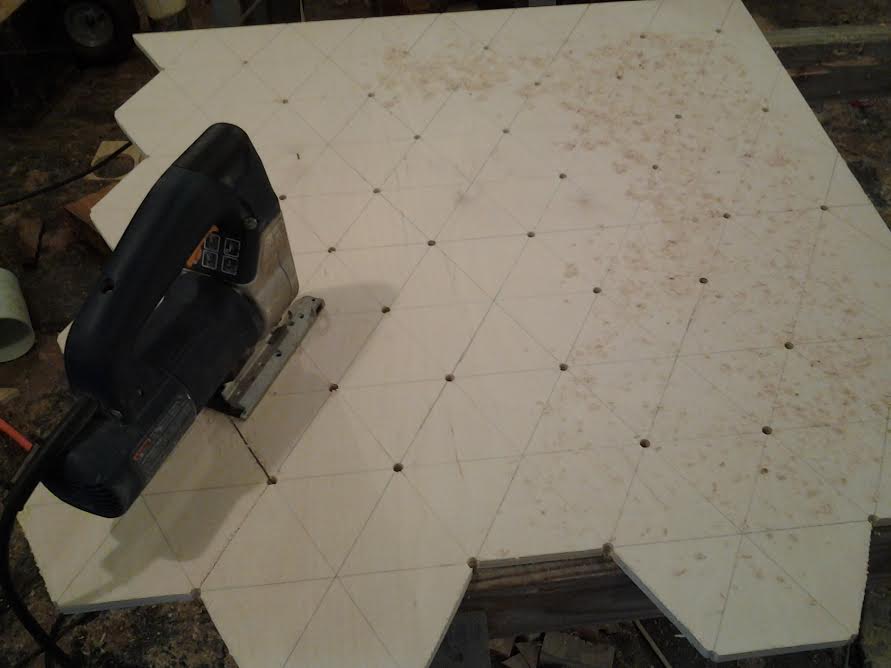
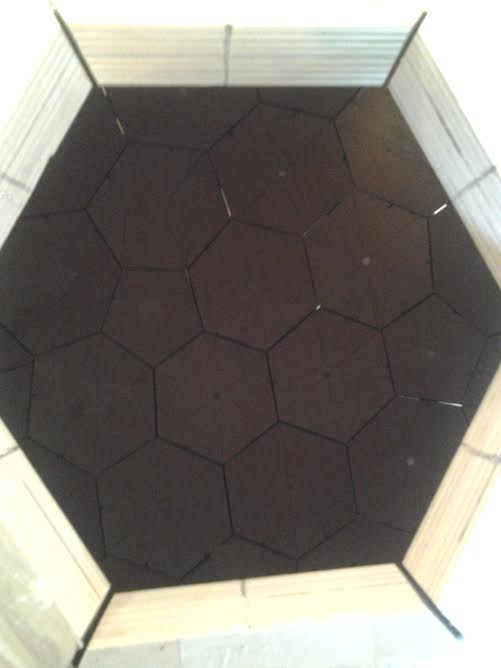
The new globe began like my first globe as a polyhedron. I picked a different polyhedron model that has fewer pieces, but will still be round enough to make into a sphere without having to remove too much wood. It has 72 faces, each face is made from two pieces of half inch baltic birch plywood to give nearly a full inch of thickness. The hexagons are nearly regular, so I roughed them out oversize as regular hexagons after laying out a simple hexagonal grid on the plywood. This made very efficient use of the expensive plywood. I ended up drilling a hole through the center of each face so that I could use a nut and bolt as a clamp when gluing the two pieces together for each face - that provided plenty of clamping pressure and also prevented the parts from sliding around before the glue took hold. There are also twelve pentagons used in the construction.
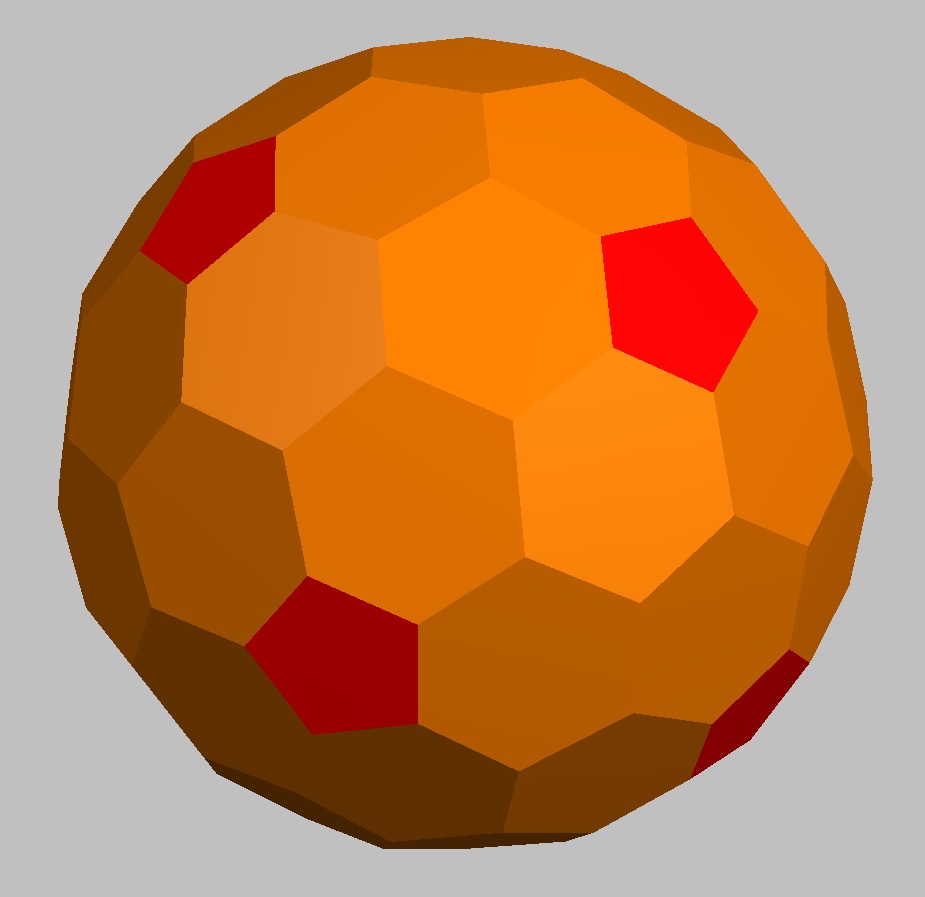
Here is a model of the polyhedron I am using for this globe. This will be easier to build than the sphere used for my first globe because all of the bevel angles on each face are equal. Turns out that the pieces were roughed out a little bit larger than they needed to be to make a 24" diameter sphere, so now it will be 26" instead - much larger than the previous 18" globe.
For you math lovers out there, this polyhedron was made by truncating a pentagonal hexecontahedron by intersecting a concentric dodecahedron of the appropriate size and replacing the 5-point vertices with pentagons where the two polyhedrons intersect.
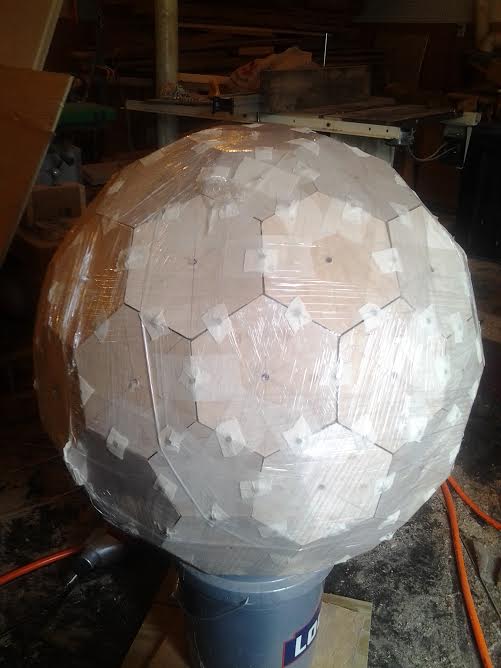
The parts are assembled using masking tape. As the assembly grew larger, the tape started to fail because of the weight. I needed something temporary to hold it all together until I could get it stretch-wrapped. The answer is staples. One staple bridging across each edge keeps everything together, and they can be removed easily enough later after wrapping. Next time I will use nothing but staples.
With the assembly wrapped up, the staples were removed and small box nails are driven into each edge to hold the joints open for the glue. The wrap is only a few layers thick, but it exerts quite a bit of force on the edges so I had to use a hammer to carefully drive them in. I also used a spreader clamp to pry open the tightest joints using bolts inserted in the center holes to push against. A piece of tape on top of each nail keeps them from falling out - sometimes while prying the joints open some of the surrounding joints open further and the nails fall out.
I also used a lazy susan to be able to move the assembly around easier. The assembly is quite a bit heavier than others I have made before.

After adding several more layers of stretch wrap, I taped around one of the pieces and cut away the wrap inside in order to remove one of the pieces to have access to the interior again. Because the wrap sticks to itself, the layers underneath are not able to come undone. I patched any of the center holes where the tape might have come loose when I used the spreader clamp - don't want glue to leak through. The assembly is now ready for gluing.
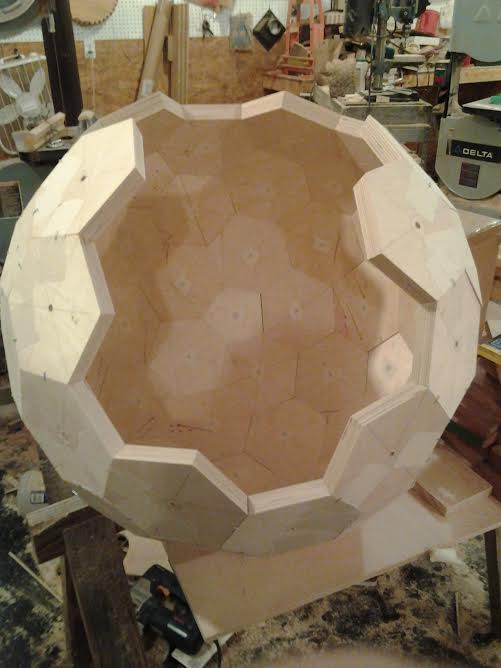
A look inside. All the joints are open and you can see the nails if you look closely. Notice the dents in the edges of the opening where the nails were driven in. It would be an interesting experiment to measure the pressure created by the stretch wrap. Excess glue was drained by re-opening one of the center holes and positioning that hole at the bottom over the bucket.
I didn't take any pictures during gluing because I had to work fast to get all the nails pulled back out before the glue sets.
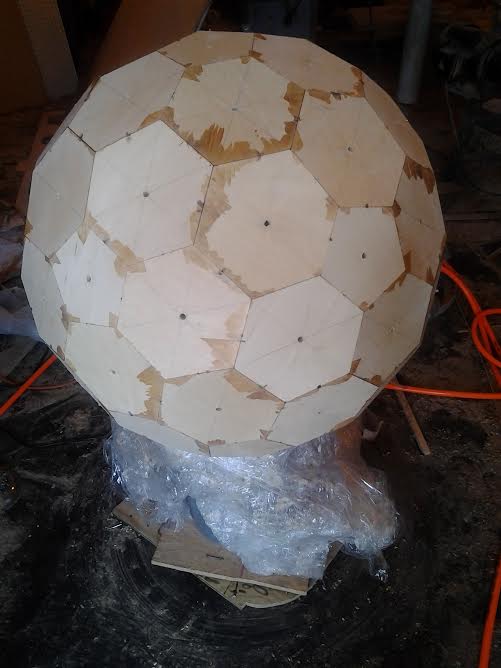
Now that glue has dried, the wrap is cut away. The next step will be to make the polyhedron into a perfectly round sphere using a router and a special jig like the one I used for my first globe. In the process of rounding there will be an interesting pattern of concentric circles on each piece exposed as the curvature intersects the plywood layers - but that will be covered up later. The main difference between this globe and my first one is that the first one left the base sphere exposed in the oceans. This one is going to be completely covered.
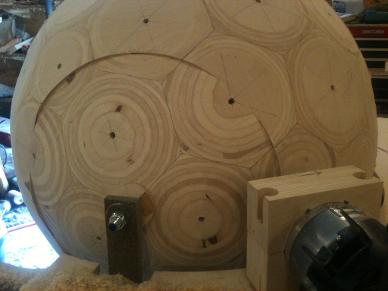
Some of the vertex points are also symmetry axes. I used two opposite points on one of the 3-fold axes and drilled holes for the axle. The router sled has two pegs in the bottom that ride in a groove to keep the router bit concentric and perpendicular to the sphere. The sphere is turned as the router cuts. As the corners are cut down, the layers of the plywood are exposed as circles. These circles can be counted to gage how far into the plywood I have cut. The plywood polygons have 18 layers of thickness in about an inch.
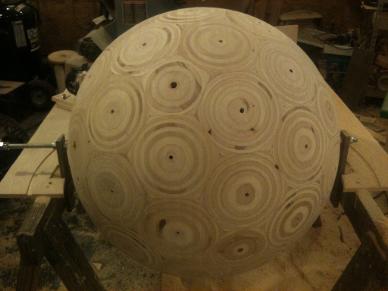
The nearly completed sphere looks very interesting. There are some remaining flat spots on the left side of the photo. Rather than making the entire sphere thinner, I will glue small pieces of plywood to the flat spots and rout them after the glue dries. I got the sphere about 1/8 inch off-center along the axle. It will also need to be balanced by gluing weights in the interior. At this point the sphere measures justbarely over 26 inches (66cm) in diameter.